


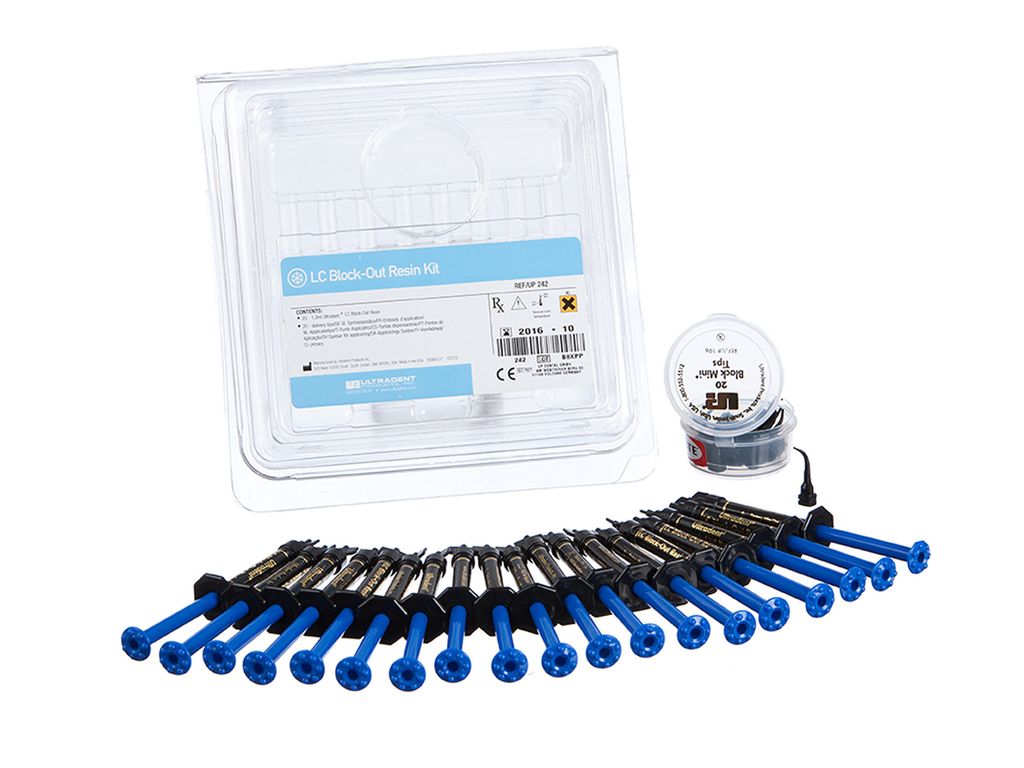
Ultradent LC Block-Out Resin
Share
Product Information
Ultradent™ LC Block-Out Resin provides reservoir space for whitening trays and so much more. Use it for lab procedures requiring spacing or undercut block out, and to repair small fractures or voids in laboratory models. It must be light-cured and is not intended for intraoral use.
- Low viscosity for easy flow
- Blue pigment for easy visibility
- Great utility resin with numerous uses
- Use with Black Mini™ Tip
- Certified gluten free
MDA Registration No: GMD75619799618A

Technical Details
Multipurpose Resin
Ultradent LC Block-Out Resin is ideal for creating reservoir space in whitening trays, but it can do so much more! Use it for lab procedures requiring spacing or undercut block out, and to repair small fractures or voids in laboratory models.
Ideal Viscosity
Placing a resin on a stone model requires that the resin not slump or migrate as the stone model is rotated. Ultradent LC Block-Out Resin features an ideal viscosity that prevents the resin from moving to areas where it’s not intended to go.
Easy to Use
Ultradent LC Block-Out Resin features a no-mix formula that is easily delivered via syringe, allowing for precise placement.
Clinicals

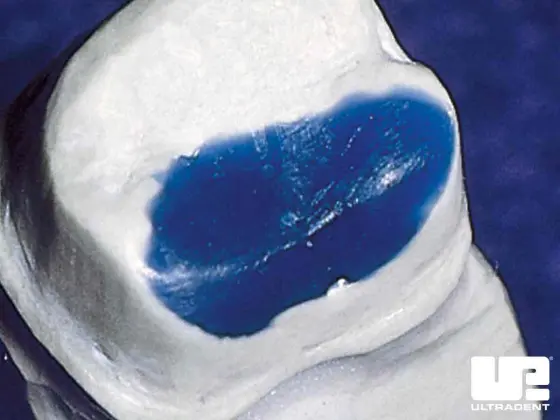
Create Reservoir Spaces
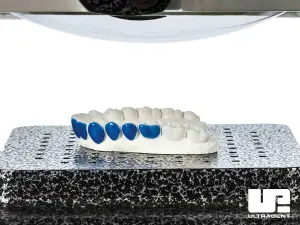
Block Ot Undercuts
Procedures
Tray Fabrication Step by Step
See Instructions for Use for complete instructions, warnings, and precautions.
Step 1
 Pour impression with fast-set plaster or dental stone. Pour alginate shortly after making impression to ensure accuracy. Trimming is less work if quantity of stone is kept to a minimum. Palate and tongue areas are not poured or should be removed after plaster has set. Allow model to dry two hours.
Step 2

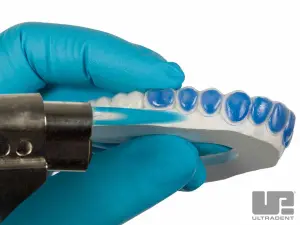
For reservoir spaces, apply Ultradent™ LC Block-Out resin approximately 0.5 mm thick onto labial surfaces and approximately 1.5 mm shy of the gingival margin. DO NOT extend onto incisal edges or occlusal surfaces. Using a VALO™ curing light, cure each tooth 5 seconds. Wipe off oxygen inhibition layer.
Step 3
With a vacuum former, heat tray material (Sof-Tray™ Classic Sheets) until it sags approximately ¼" to ½" for the 0.035" material and 1" for the thicker material (0.060" and 0.080"). Adapt plastic over model. Cool and remove model from the vacuum former. Cut excess bulk of material away with serrated plastic trimmers (e.g. Ultradent™ Utility Cutters).
Step 4

With small tactile scissors (e.g. Ultradent™ Ultra-Trim Scalloping Scissors), carefully and precisely trim the tray to the clear line which is at the gingival height. Scallop edges to avoid contact with gingival tissue.
Step 5
Return tray to model; check tray extensions. Gently flame polish the edges one quadrant at a time, if necessary, with a butane torch. While still warm, immediately hold periphery of each segment firmly against model for three seconds with water-moistened gloved finger. If this over-thins the tray material, fabricate a new tray.
Step 6
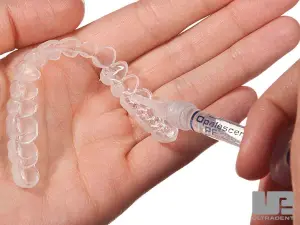
Review enclosed instructions with patient to brush teeth and explain the process of loading the tray by expressing one continuous bead of gel approximately halfway up from the incisal edge on the facial side of the tray from molar to molar. Explain that this should use about 1/2 to 1/3 of a syringe.
Step 7
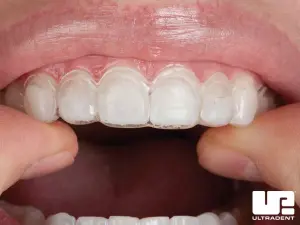
Place tray over teeth. Gently press tray to move gel into place. Pressing too firmly will force gel out of tray.
Step 8

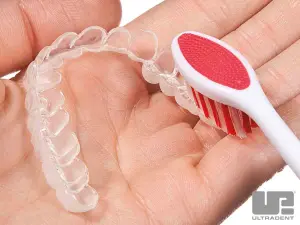
Remove excess gel with a soft toothbrush.
Step 9
Clean tray with soft toothbrush and water. Remind patient to follow the whitening regimen you have established.
Note: See Instructions for Use for complete instructions, warnings, and precautions.
Reviews
Be the first to review
Write an review
How would you rate the product?
More thought about the product